
Once you’re signed in, the Shoopy admin is split into three regions: a sidebar on the left for navigation, a header at the top for store-wide controls, and a content area in the middle where the current page renders. Overall, this article is a quick tour of each — enough to find your way around. In addition, each module listed below has (or will have) its own detailed article.
Before you begin #
- You need a Shoopy account. If you don’t have one, start with Create your Shoopy account.
- You need admin (or staff) access to a store — what you see depends on your role. For example, if you can’t find a menu item someone else mentions, it may be hidden for your permission level.
The three regions #
| Region | What lives there |
|---|---|
| Sidebar (left) | Top-level modules — Dashboard, Invoices, Orders, Catalog, Customers, Promotions, Reports, Online Store, App Store, Billing Plans, and your Wallet balance at the bottom |
| Header (top) | Page title, store switcher, location switcher (when multi-location is enabled), notifications bell, profile menu, and a plan-status badge if your plan is free, expired, or expiring |
| Content (centre) | The currently open module — changes as you click around the sidebar |
The sidebar #
The sidebar is how you move between modules. However, not every item is a single link — some expand to show sub-items. To expand a group, click the chevron (▾) next to its name.
Here’s a one-line description of each top-level item, in the order they appear:
| Item | What it’s for |
|---|---|
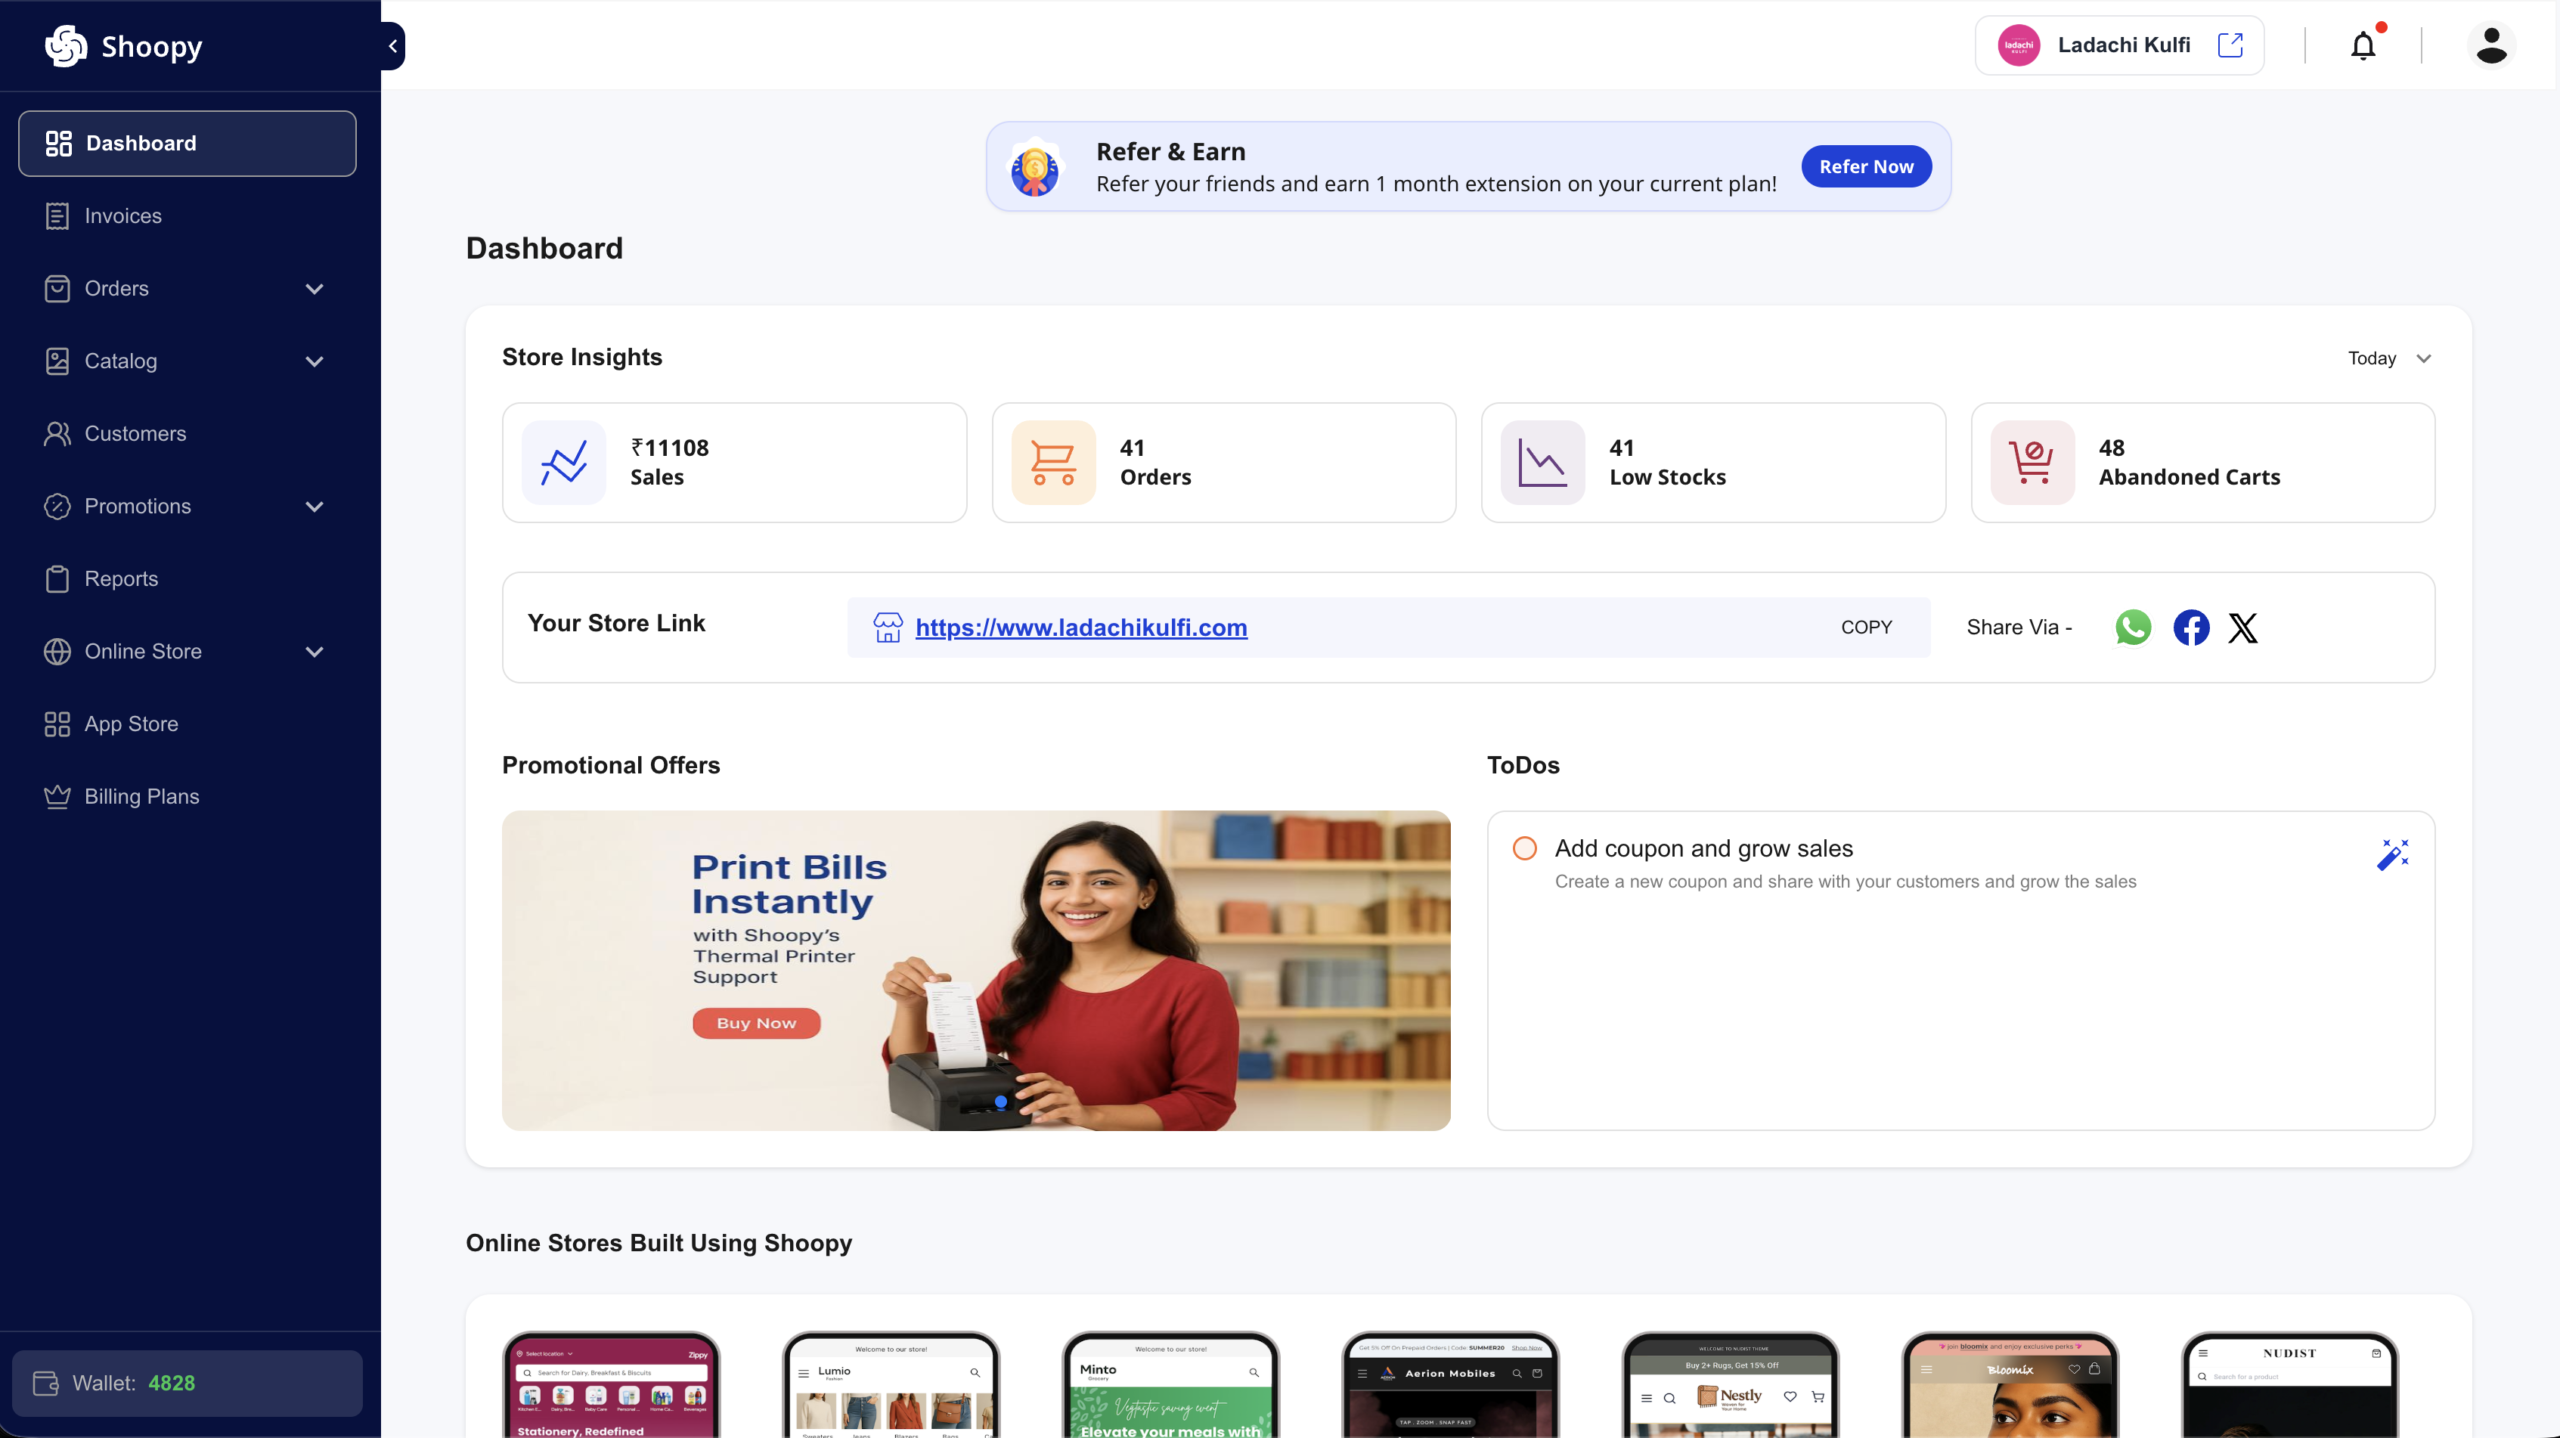
| Dashboard | Your store’s home screen — sales, orders, low stock, abandoned carts, and quick actions |
| Invoices | Create and manage invoices for your customers |
| Orders | Online orders, purchase orders (POs), estimates, and abandoned carts |
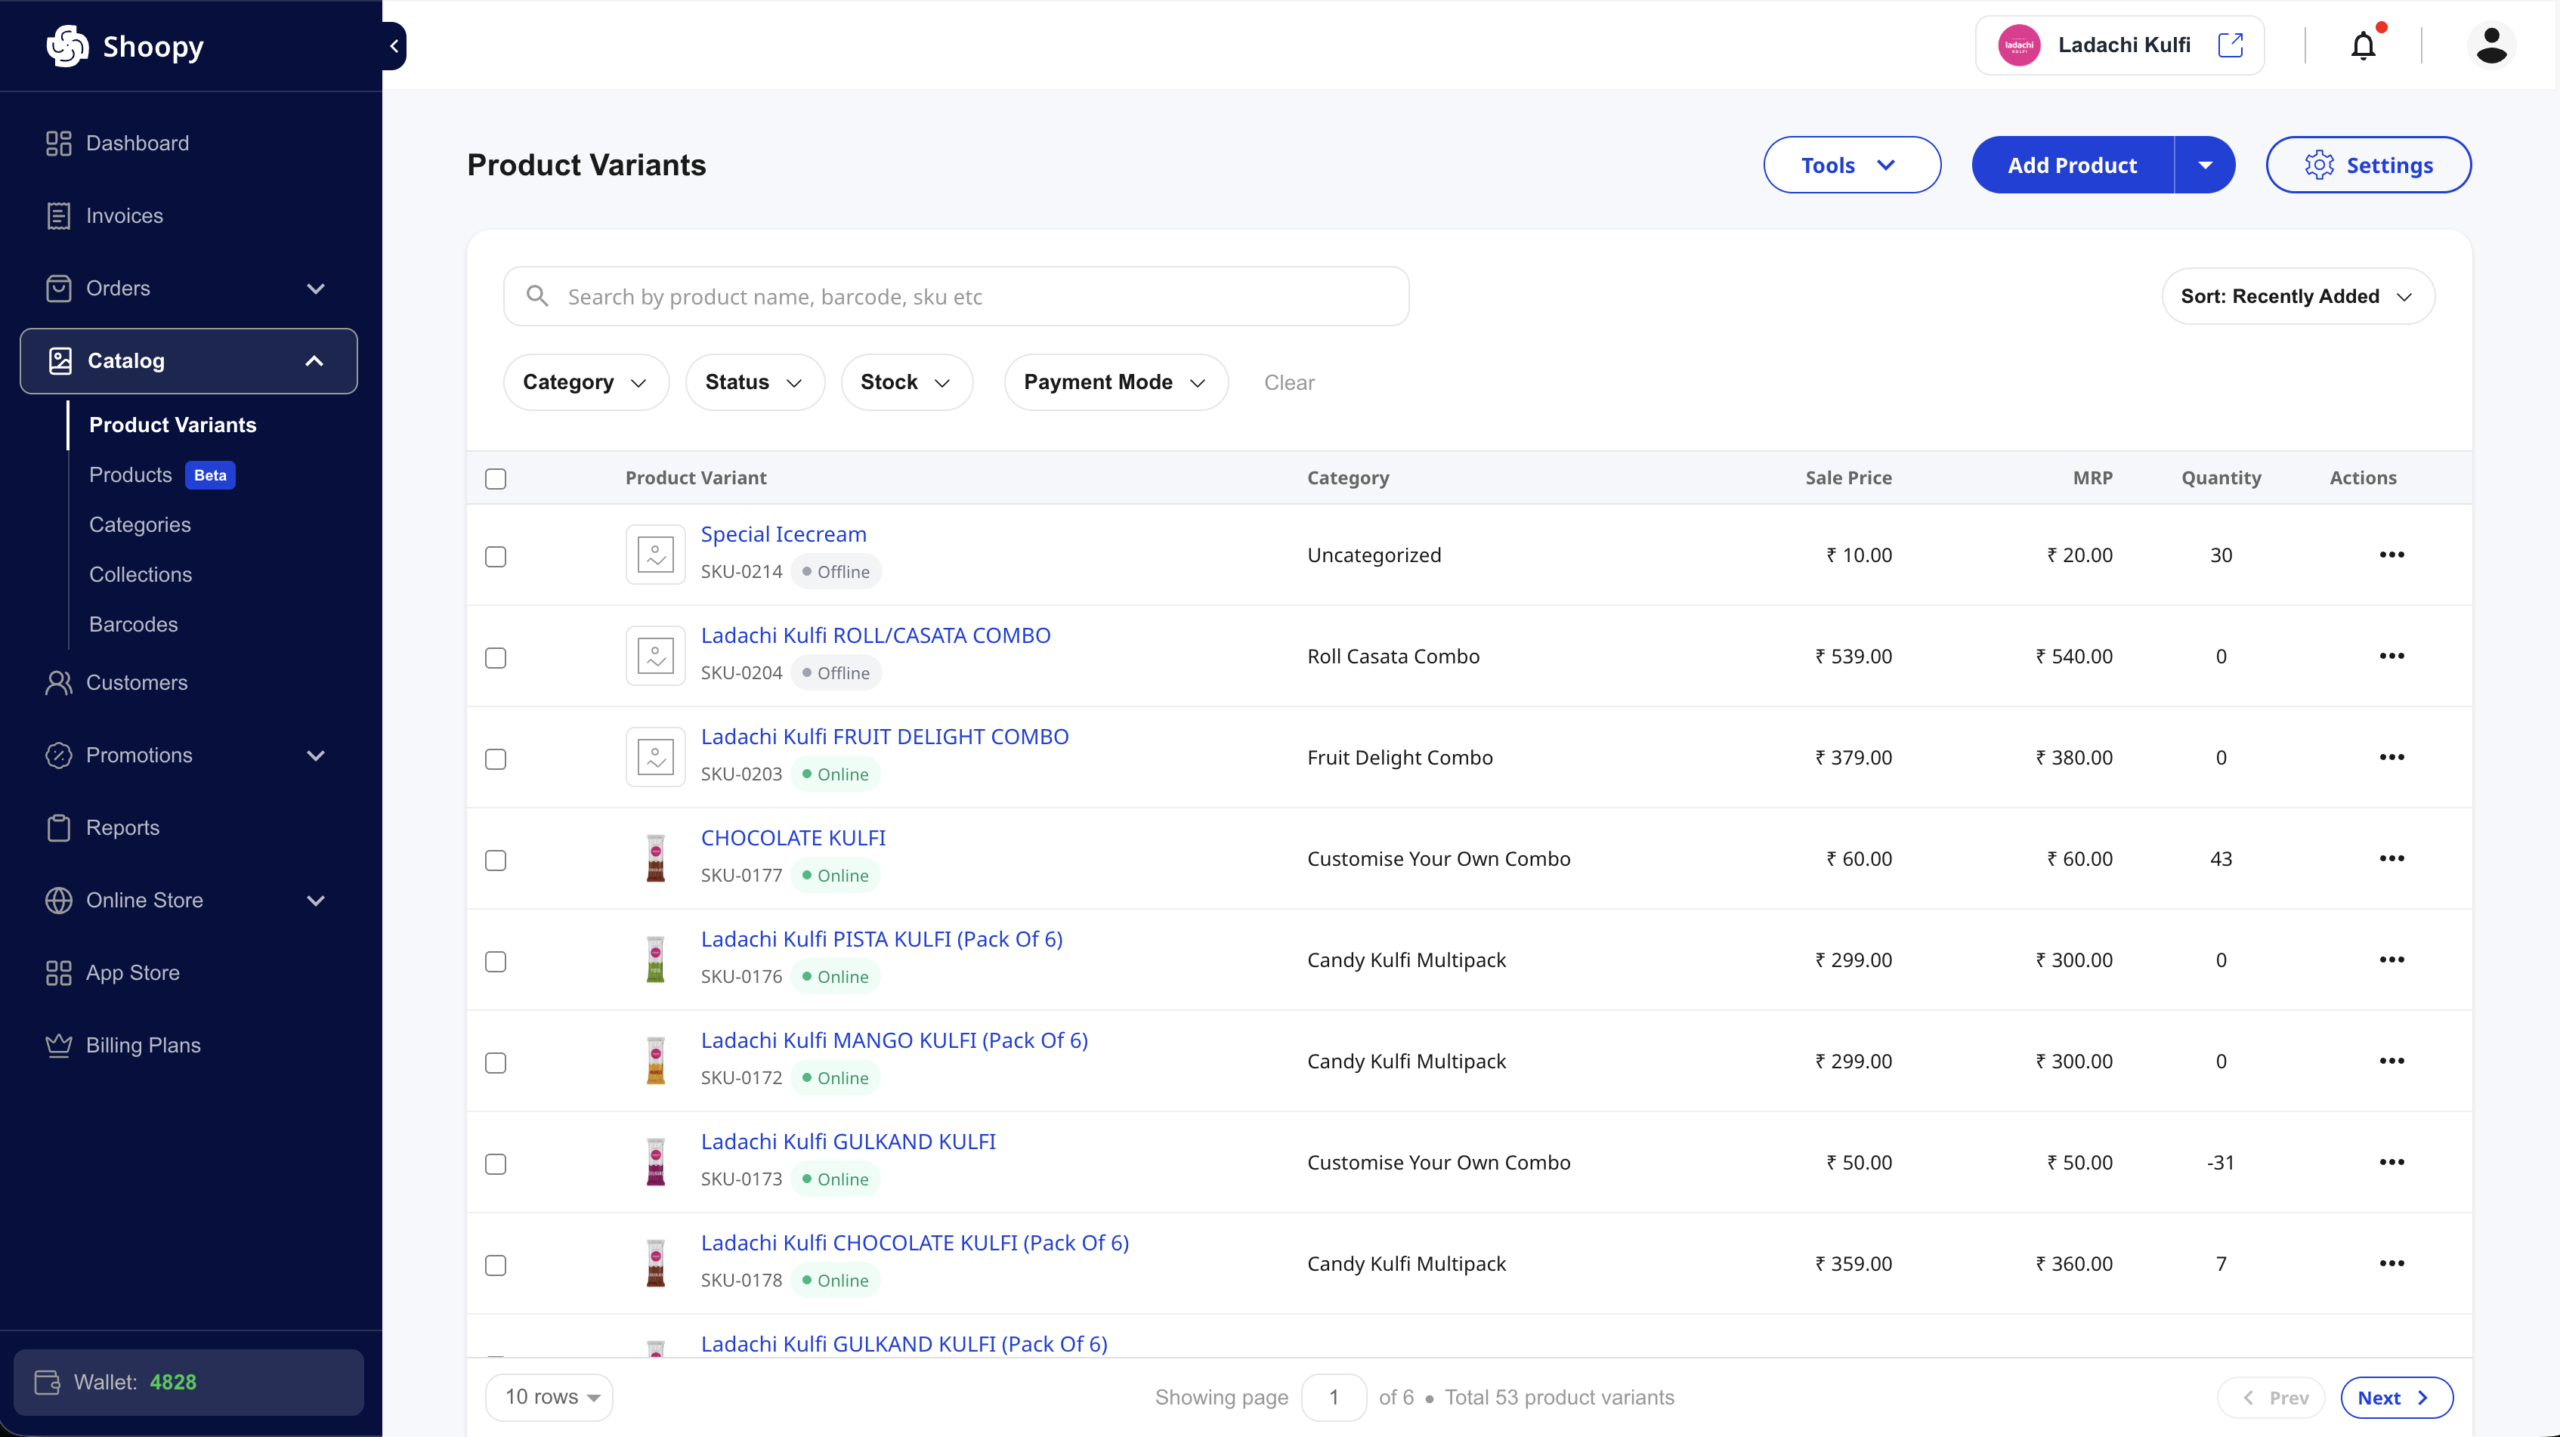
| Catalog | Product variants, products, categories, collections, and barcodes |
| Customers | Your customer list, profiles, and wallet balances |
| Promotions | Coupons, banners, and the Refer & Earn referral program |
| Reports | Sales, payment, inventory, and GST reports |
| Online Store | Store settings, display/theme customisation, themes, users & roles, store locations, blog, and pages |
| App Store | Payment gateways, shipping integrations, marketing tools, and other add-ons |
| Billing Plans | Compare and upgrade your Shoopy plan |
In addition, at the very bottom of the sidebar you’ll see your Wallet balance — Shoopy credits you can spend on upgrades, renewals, and certain add-ons.
The header #
Next, the header spans the full width at the top of the page. In particular, its right side is where most of the global controls live.

From left to right:
- Page title — the name of the module you’re currently on (Dashboard, Orders, etc.)
- Plan status (conditional) — appears when your plan is free, expired, or expiring soon, with a quick link to Select Plan or Renew. If your plan is active and not nearing expiry, nothing shows here.
- Store switcher — shows your current store’s logo and name. Click the external-link icon to open your storefront in a new tab — for example, a live Shoopy-powered storefront looks like www.ladachikulfi.com. However, if you own multiple stores, this control turns into a dropdown for switching between them.
- Location switcher (multi-location stores only) — if your store has multiple physical locations enabled, use this to scope what the dashboard shows. Pick All Locations to see everything, or a specific location to filter.
- Notifications bell — a red dot means you have unread notifications. Click to see them.
- Profile avatar — your account menu. Detailed below.
The profile menu #
Clicking the avatar on the far right opens your account menu:
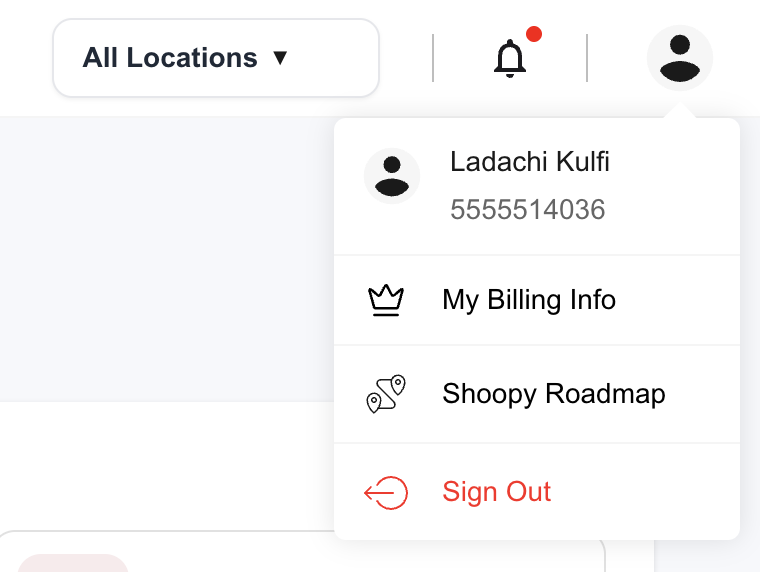
- Your name and contact — the phone number or email you signed up with
- My Billing Info — invoices and billing history for your Shoopy subscription (shown only if your role has billing permission)
- Shoopy Roadmap — a link to what the Shoopy team is building next
- Sign Out — ends your session on this device
The location switcher #
Additionally, if your store runs out of more than one physical location, the location switcher lets you focus the dashboard, orders, and reports on a single location — or view everything combined.
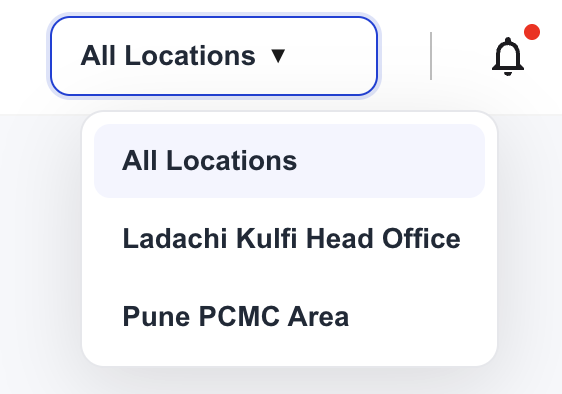
For example, pick All Locations when you want a store-wide view, or a specific location to filter down. The switcher appears when multi-location is enabled on your store and you have at least one location assigned. If your store has a single location, it stays hidden.
What changes based on your role #
Shoopy hides menu items your role doesn’t have access to. For example, a catalog manager will see Catalog and Collections but not Billing Plans or Users & Roles. Similarly, a sales rep will see Orders and Customers but not the store-customisation modules.
Also, if a whole group has no sub-items allowed for your role, it won’t show at all. As a result, the sidebar for a staff member is typically shorter than the sidebar for an owner. The Users and Roles article covers this in depth.
What changes based on your plan and setup #
- Custom domain: If your store is served on its own domain (not
web.shoopy.in), some items — notably App Store and Billing Plans — are hidden from the sidebar. Upgrade and add-on flows run through your main Shoopy admin instead. - Free plan: Some features inside modules are gated. You’ll see them in the sidebar but get an upgrade prompt when you try to use them. See Choosing your Shoopy plan for what each tier unlocks.
- Beta features: Items flagged Beta (e.g. the new Products page under Catalog) are available but still being refined. You can use them in production; expect minor UI changes over time.
Tips #
- First, bookmark the Dashboard URL after you log in. It’s the fastest way back to the home screen from any deep page.
- Also, the sidebar collapses. Click the small arrow at the top of the sidebar to collapse it to icon-only width on smaller screens.
- In addition, notifications aren’t just alerts — they’re actionable. Payment failures, refund requests, and low-stock warnings all surface here; handle them from the bell before they pile up.
- Finally, your Wallet balance is real money off. It accumulates from referrals, promotions, and campaign credits, and can be used on your next plan upgrade or renewal.
Troubleshooting #
Issue: I can’t find a menu item that someone else can see.
Most likely, your role doesn’t have permission for it. Alternatively, you’re on a custom domain (which hides App Store and Billing Plans). In either case, ask the store owner to check your role under Online Store → Users & Roles.
Issue: The location switcher isn’t showing up for me.
First, note that the switcher only appears when multi-location is enabled on your store and you have at least one location assigned to your account. Also, if your store has a single location, the switcher is hidden by design.
Issue: I see a plan expiry countdown but I just paid.
Generally, plan changes take effect on the next app load. Therefore, log out and log back in, or hard-refresh the admin. However, if the countdown persists, contact support — the payment may not have been recorded.
Issue: I own more than one store but I only see one in the store switcher.
Typically, this means you’re signed in with a different phone or email for the other store. In that case, sign out and sign back in with the account that owns the missing store.
Related articles #
Category: Getting Started · Author: Shoopy Team · Last reviewed: 2026-04-19